

A hydrostatic plumbing test fills a pipe, fitting, or pressure vessel with water and pushes the internal pressure to roughly 1.5 times the system's rated working pressure, holding it there for a fixed period while a technician watches the gauge for pressure drop that signals a leak. The cost runs anywhere from 150 to 500 dollars for a residential plumbing test and climbs into the thousands for industrial piping systems that require certified witnesses, calibrated gauges, and documented test reports. That is the practical answer. Everything below explains why the test works this way, what the numbers actually mean, and where the process differs between a home inspection and a code-stamped industrial pressure system, which is the side of this work we handle daily at MWalloys on fabricated nickel alloy and stainless piping headed to chemical plants and offshore platforms.
We have pressurized enough pipe spools to know that the test itself is simple physics, water does not compress the way air does, so any volume loss inside a sealed system shows up immediately as a pressure drop on the gauge. The complexity lives in the details, test duration, pressure calculation, temperature correction, and what happens when the gauge needle actually moves.
What Does a Hydrostatic Test Actually Measure?
The test measures one thing directly, pressure retention over time, and from that single measurement it infers two things indirectly, structural integrity and joint tightness. Water gets pumped into an isolated section of piping or a vessel until the internal pressure reaches a target value above normal operating pressure. The system then sits sealed for a defined hold period, and if the pressure holds steady within an acceptable tolerance, the section passes. If pressure drops beyond that tolerance, something is leaking, a poorly seated fitting, a porous weld, a hairline crack in a joint, or a valve that is not seating properly.
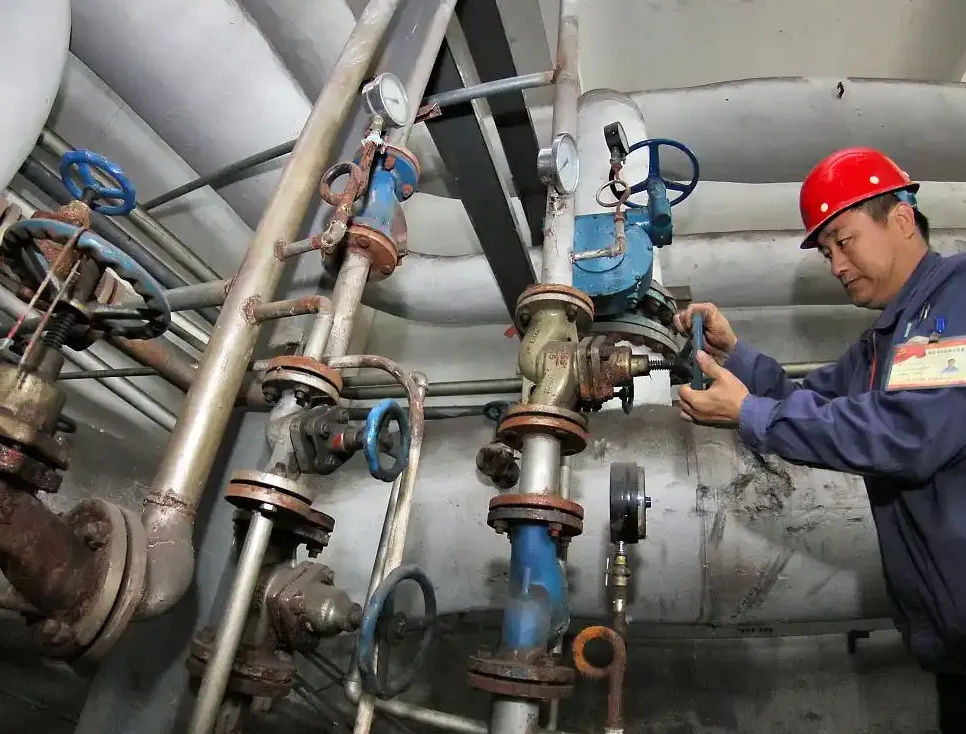
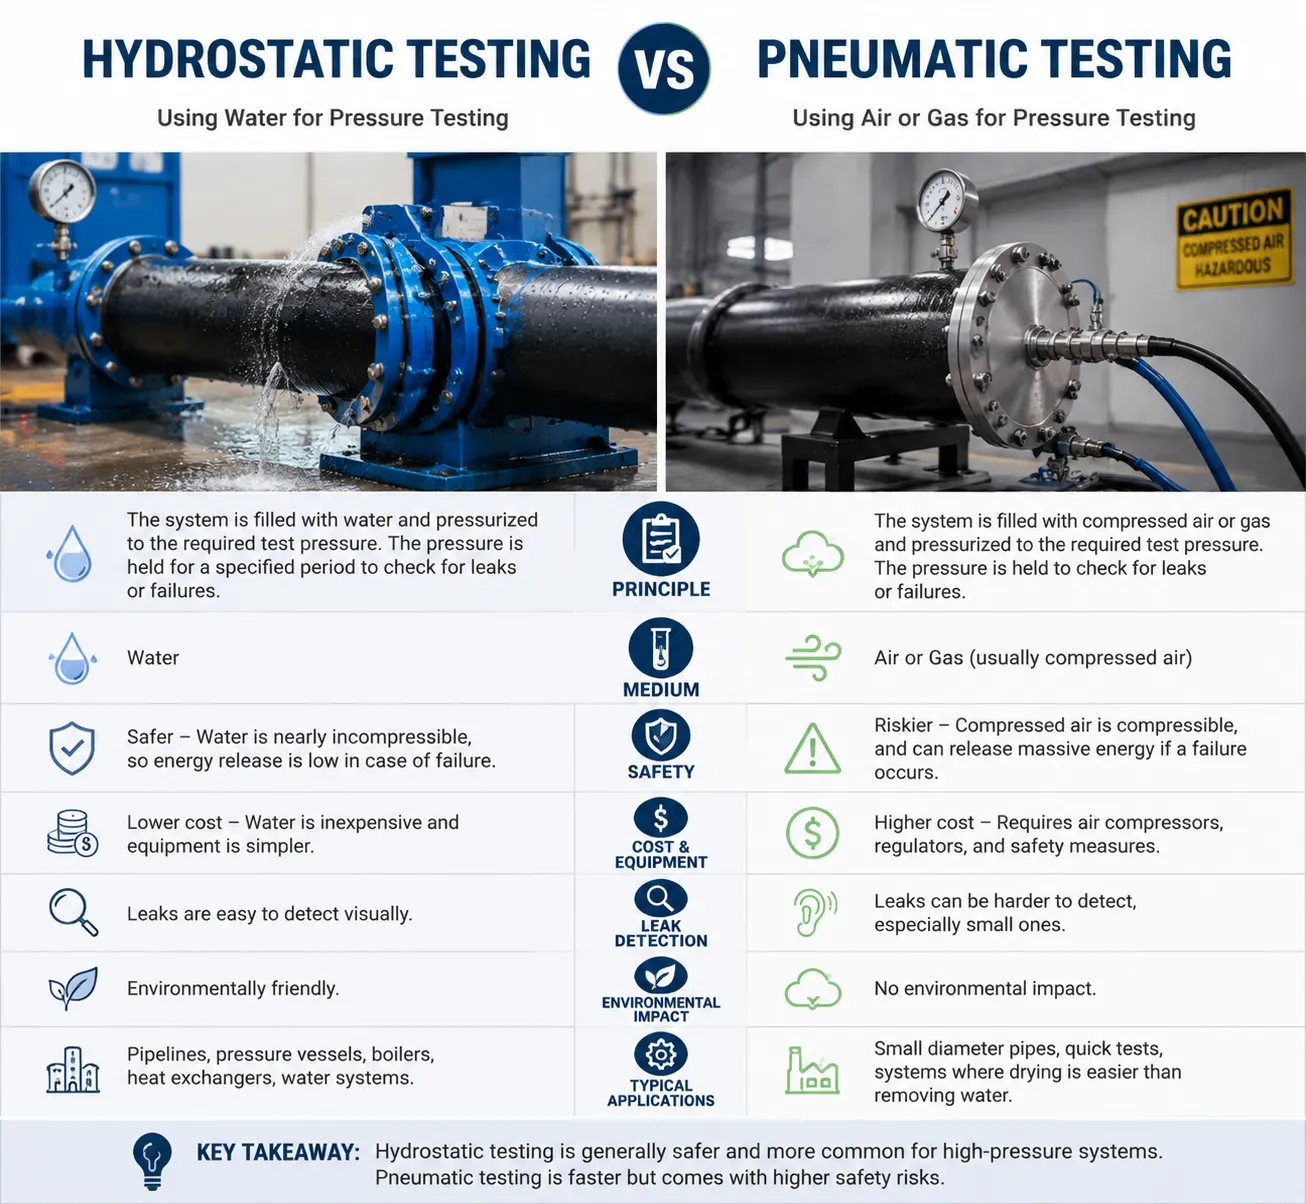
Water gets chosen over air or gas for a specific reason we explain to customers who ask why we do not just pressurize with compressed air. Water is nearly incompressible, so a small leak produces a measurable, proportional pressure drop almost instantly. Compressed air stores enormous energy when compressed, so a failure during a pneumatic test can send fragments flying with dangerous force, while a hydrostatic test failure typically just leaks water at the failure point with far less stored energy release. This is also why most plumbing and piping codes mandate hydrostatic testing as the default method and only permit pneumatic testing under specific, tightly controlled conditions.
How Do You Calculate the Correct Test Pressure?
The standard formula used across residential plumbing codes and most industrial piping codes sets test pressure at 1.5 times the maximum allowable working pressure, MAWP, of the system component being tested. A pipe rated for 150 psi working pressure gets tested at 225 psi. This multiplier is not arbitrary, it comes from the safety margin built into pressure vessel and piping design codes, and testing above the working pressure confirms the system has margin left before it approaches its actual failure point.
| System Type | Typical Working Pressure | Standard Test Pressure Multiplier | Test Pressure Example |
|---|---|---|---|
| Residential water supply lines | 40 to 80 psi | 1.5x (some jurisdictions use fixed 100 psi minimum) | 60 to 120 psi |
| Residential drain, waste, vent (DWV) | Atmospheric (gravity flow) | Fixed 5 to 10 psi air/water column | 5 to 10 psi or 10-foot water column |
| Commercial fire sprinkler systems | 175 psi (per NFPA 13) | 1.5x, minimum 200 psi | 200 to 262 psi |
| Industrial process piping (ASME B31.3) | Varies by design class | 1.5x design pressure | Varies, often 300 to 2250 psi |
| Pressure vessels (ASME Section VIII) | Varies by MAWP | 1.3x MAWP (design margin per code edition) | Varies significantly by vessel class |
We calculate test pressure against the governing code first, then against the specific component's rated pressure, because using a generic 1.5x multiplier without checking the applicable code edition is one of the more common mistakes we see subcontractors make on industrial jobs. ASME Section VIII vessels, for example, use a different multiplier than ASME B31.3 piping, and getting this wrong either under-tests a system that then fails in service, or over-pressurizes a component beyond what its weakest joint can safely tolerate during the test itself.
How Long Does the Test Hold Period Actually Need to Be?
Most residential plumbing codes require a minimum hold time of 15 minutes to 2 hours depending on the jurisdiction and pipe material, while industrial piping codes typically specify a minimum of 10 minutes at test pressure with total test duration, including pressurization and inspection walk-down, often running 30 minutes to several hours for large systems. We have run tests on long pipe spools that took the better part of a shift once you factor in fill time, air removal, pressurization, the hold period itself, and the visual inspection walk-down while pressure is held.
The hold period exists for a reason beyond just watching a gauge. Water absorbs heat from the pipe wall and surrounding air during pressurization, and thermal equilibrium takes time to reach. A test read too early can show a false pressure drop simply because the water is still cooling and contracting slightly, not because anything is leaking. This is why most codes distinguish between the initial stabilization period and the actual timed hold period, and why rushing a test to save time on a job site produces unreliable results that either falsely fail a good system or, worse, falsely pass a system with a slow leak that has not yet shown up on the gauge.
What Steps Happen During an Actual Test?
We walk every customer through the same sequence regardless of whether the job is a three-bathroom house or a 40-foot Inconel pipe spool headed to a refinery.
First, isolation. The section being tested gets sealed off from the rest of the system using test plugs, blind flanges, or valves rated for the test pressure, and every open end that is not part of the test boundary gets capped.
Second, air removal. The system fills slowly from the lowest point while air vents open at the highest points, because trapped air compresses under pressure and produces false, spongy pressure readings that mask real leaks. This step gets skipped more often than it should on residential jobs, and it is the single biggest cause of inconclusive test results we encounter when called in to troubleshoot a failed inspection.
Third, pressurization. A test pump, hand-operated for small residential systems or motor-driven for industrial volumes, raises pressure gradually to the calculated test value, never in one sudden stroke, because rapid pressurization can itself induce stress that shows up as a false failure.
Fourth, the hold and inspection. Pressure holds at target for the code-required duration while a technician physically walks the entire tested section looking and listening for leaks at every joint, fitting, weld, and valve seat.
Fifth, documentation. For residential work this might be a signed inspection card. For industrial work this is a full test report showing gauge calibration certificates, test medium, temperature, pressure readings at start and end, hold duration, and the inspector's signature, because that document becomes part of the permanent quality record for the piping system.
What Equipment Is Actually Required to Run This Test Correctly?
| Equipment | Purpose | Residential Grade | Industrial Grade |
|---|---|---|---|
| Test pump | Raises system pressure with water | Manual hydrostatic hand pump | Motorized pump, higher volume and pressure capacity |
| Pressure gauge | Reads and monitors test pressure | Analog dial gauge | Calibrated digital gauge with data logging, NIST-traceable certificate |
| Test plugs/caps | Seal open pipe ends and isolate the test section | Rubber expansion plugs | Rated blind flanges, mechanical test heads |
| Air release valves | Vent trapped air during fill | Manual bleed valve | High-point vents at every elevation change |
| Chart recorder or data logger | Creates permanent pressure-vs-time record | Rarely used | Standard requirement for code-stamped work |
| Relief valve | Prevents accidental over-pressurization | Sometimes present | Mandatory safety component |
A calibrated gauge matters more than most homeowners realize. A gauge that has not been checked against a known reference in the last year can read several psi off, which does not matter much on a 60 psi residential line but matters a great deal on a 1500 psi process line where that same error margin could mask a genuine defect or falsely reject a sound weld. Every gauge we use on fabricated piping test packages carries a current calibration certificate traceable to a national standard, and that certificate ships with the final documentation package to the customer.
How Much Does a Hydrostatic Test Actually Cost?
Cost depends on scale, accessibility, and whether the work requires a certified witness for code compliance documentation.
| Test Scope | Typical Cost Range (2026 pricing) | What Drives the Price |
|---|---|---|
| Single residential plumbing line (leak diagnosis) | 150 to 350 dollars | Access difficulty, number of fixtures isolated |
| Whole-house plumbing pressure test | 250 to 500 dollars | House size, number of test sections, water heater bypass needs |
| New construction rough-in test (per code inspection) | 200 to 600 dollars | Local permit fees, number of re-tests after repairs |
| Commercial fire sprinkler system test | 500 to 2,500 dollars | System size, number of zones, NFPA documentation requirements |
| Industrial pipe spool or skid test (shop) | 800 to 5,000+ dollars | Pipe diameter, pressure class, third-party witness fees |
| Pressure vessel hydrostatic test | 2,000 to 15,000+ dollars | Vessel volume, code stamp requirements, water disposal costs |
We price industrial test packages against a handful of variables that homeowners never have to think about, water sourcing and disposal for large-volume tests, third-party inspector day rates when a customer's quality department requires an independent witness, and the labor hours needed to rig temporary test heads on a spool that will later be welded into a larger system. A small residential leak test costs less mainly because the volume of water and the documentation burden are both a fraction of what an ASME-stamped vessel requires.
What Causes a Hydrostatic Test to Fail?
A pressure drop during the hold period is the test failing, and the cause almost always falls into one of these categories, ranked by how often we actually find them on job sites.
Loose or improperly seated fittings account for the majority of residential test failures, particularly threaded connections that were not tightened to proper torque or soldered joints with insufficient flux coverage. Weld defects, including porosity, incomplete fusion, or the hot cracking we deal with regularly in nickel alloy fabrication, cause the majority of industrial test failures and typically require grinding out the defect and rewelding before retesting. Valve seat leakage shows up when a valve used to isolate the test section is not fully seating, which sometimes gets mistaken for a pipe or joint failure until the valve itself gets isolated and checked separately. Thermal expansion or contraction mimics a leak when temperature correction was not properly accounted for during the test, producing a pressure change that has nothing to do with an actual defect. Gauge or equipment malfunction, including a faulty test plug or an uncalibrated gauge, occasionally causes a false failure that wastes hours before someone thinks to swap the gauge and retest.
We always retest after any repair, never assume a visible fix solved the problem, because a repaired joint that was not properly prepared can leak at a lower rate that still fails the extended hold period even though the obvious drip has stopped.
Hydrostatic Testing vs Pneumatic Testing, Which One Applies to Your Project?
| Factor | Hydrostatic Testing | Pneumatic Testing |
|---|---|---|
| Test medium | Water | Compressed air or inert gas |
| Stored energy on failure | Low, minimal projectile risk | High, significant safety hazard |
| Leak detection sensitivity | Detects even small leaks via pressure drop | Requires soap solution or ultrasonic detection at joints |
| Code preference | Default method under most codes | Permitted only where water damage or freezing is a concern |
| Cleanup after test | Requires water drainage and drying | No liquid to remove |
| Common use case | Standard plumbing, process piping, vessels | Dry systems, freeze-sensitive locations, gas piping pre-service |
We default to hydrostatic testing on essentially every job unless the customer's system genuinely cannot tolerate water exposure, such as certain gas distribution lines or systems that will operate in freezing environments where residual water could crack a fitting before the system is drained and dried. Pneumatic testing has its place, but the safety protocol around it, exclusion zones, pressure relief devices, gradual pressurization in stages, is considerably more involved than most people assume, which is another reason codes generally push toward hydrostatic testing as the default.
What Codes and Standards Govern Hydrostatic Testing?
| Standard | Governing Body | Scope |
|---|---|---|
| International Plumbing Code (IPC) | International Code Council | Residential and commercial plumbing rough-in testing |
| Uniform Plumbing Code (UPC) | International Association of Plumbing and Mechanical Officials | Alternative residential/commercial plumbing code, adopted regionally |
| ASME B31.3 | American Society of Mechanical Engineers | Process piping in chemical and industrial facilities |
| ASME Boiler and Pressure Vessel Code, Section VIII | American Society of Mechanical Engineers | Pressure vessel hydrostatic testing requirements |
| NFPA 13 | National Fire Protection Association | Fire sprinkler system hydrostatic testing |
| API 570 | American Petroleum Institute | In-service piping inspection, including hydrostatic re-test criteria |
We build our fabrication test packages against whichever code governs the customer's project rather than a generic in-house standard, because a pressure vessel destined for ASME Section VIII certification has entirely different documentation and witness requirements than a piping spool tested only against B31.3, and mixing those requirements up delays project acceptance far more than the test itself ever costs in time.
What Happens After a System Passes the Test?
A passing test does not end the process, it starts the documentation trail that follows the system for its service life. Residential inspections typically require a signed test card that the local building department retains as part of the permit record, and homeowners should keep a copy for future property transactions since some buyers' inspectors ask for proof of a passed pressure test on newer plumbing. Industrial systems require a formal test report that becomes part of the manufacturing data record, often bundled with material certificates, weld procedure qualifications, and NDT reports we discussed in our nickel alloy fabrication work, all of which travels with the equipment for its operating life and gets referenced during future in-service inspections.
Draining and drying the system properly after a hydrostatic test matters more than people expect, particularly for systems that will sit idle before entering service, since residual water left in low points of stainless or nickel alloy piping can promote pitting corrosion or, in cold climates, freeze damage before the system ever sees its first working cycle. We specify a full drain-down and, on stainless and nickel alloy systems, sometimes a nitrogen purge to displace residual moisture before the piping ships or gets put into storage.
Frequently Asked Questions
How long should a hydrostatic plumbing test hold pressure before it passes?
Most residential codes require a minimum hold time between 15 minutes and 2 hours, while industrial piping codes typically specify at least 10 minutes at full test pressure with a longer total inspection window. The exact duration depends on the local jurisdiction's plumbing code or, for industrial work, the governing engineering code such as ASME B31.3. We always confirm the specific hold time requirement with the inspector or code reference before scheduling the test, since showing up with the wrong duration in mind wastes an entire test cycle.
Can a hydrostatic test damage new pipe or fittings?
A properly executed test at the correct calculated pressure will not damage sound pipe or fittings, since the test pressure sits within the design safety margin built into the material specification. Damage occurs almost exclusively from operator error, sudden pressurization instead of gradual buildup, exceeding the calculated test pressure, or testing a component that was already defective before the test began. We always pressurize gradually and never exceed the code-calculated maximum, which protects both the system and the validity of the test result.
What is the difference between a rough-in test and a final plumbing test?
A rough-in test happens before walls are closed up and fixtures installed, checking the bare pipe network for leaks while everything remains visible and accessible for repair. A final test happens after fixtures are connected and the system is essentially complete, confirming the whole assembly holds pressure under real operating conditions. Skipping the rough-in test to save time is a common shortcut that backfires, since finding a leak after drywall is installed costs far more in repair labor than catching it during the accessible rough-in stage.
Does a hydrostatic test detect slow leaks that only show up over days?
A standard hydrostatic test with a 15-minute to 2-hour hold period will not reliably catch extremely slow leaks, such as a hairline crack that only loses a fraction of a psi per hour. For situations where a slow leak is suspected but not confirmed by the standard test, we extend the hold period to 24 hours or longer with a data logger recording pressure continuously, which is standard practice on high-value industrial systems where a slow leak in service would be far more costly than extra test time upfront.
Is hydrostatic testing required by law for new plumbing installations?
Yes, in nearly every jurisdiction in the United States and most international building codes, new plumbing installations must pass a pressure test before final inspection approval, and this requirement is written directly into the adopted plumbing code, whether IPC or UPC. Skipping this step is not a matter of preference, it is a code violation that will prevent the project from receiving a certificate of occupancy. We treat this test as a mandatory milestone on every project schedule, not an optional quality check.
What pressure should residential copper or PEX piping be tested at?
Most residential codes require testing at either 1.5 times the system's working pressure or a fixed minimum, commonly 100 psi, whichever the local code specifies, held for a minimum duration that varies by jurisdiction. Copper and PEX both handle standard residential test pressures without issue when properly installed, though PEX systems sometimes show a small, expected pressure adjustment in the first few minutes as the tubing itself experiences minor elastic expansion under pressure, which is normal and not a leak.
How do you find the exact location of a leak after a hydrostatic test fails?
Locating the leak starts with a visual and audible inspection walk-down of every joint while pressure is still held, since most leaks are visible as a wet spot, drip, or audible hiss at the failure point. When the leak is hidden behind a wall or underground, we isolate sections sequentially using valves to narrow down which segment is dropping pressure, then use acoustic leak detection equipment for underground or concealed piping where visual inspection is not possible. Dye additives in the test water sometimes help confirm the exact location once the general area is narrowed down.
Can you use hot water for a hydrostatic test instead of cold water?
Cold water is the standard test medium because temperature stability during the hold period matters for accurate pressure readings, and hot water introduces additional cooling and contraction effects that complicate interpreting the gauge. Using hot water can produce a pressure drop that looks like a leak but is actually just thermal contraction as the water cools during the test. We always fill with ambient temperature water and allow the system to stabilize thermally before starting the timed hold period.
What is the minimum test pressure for a residential drain, waste, and vent system?
DWV systems, unlike pressurized supply lines, typically get tested with either a static water column of at least 10 feet of head or an air test at 5 psi, since these systems operate under gravity flow rather than continuous pressure. The lower test pressure reflects the fact that DWV piping never experiences significant internal pressure during normal operation, so the test simply confirms joint integrity rather than structural pressure capacity. Local code determines whether water column or air pressure method applies in a given jurisdiction.
How does hydrostatic testing differ for industrial nickel alloy or stainless piping compared to standard steel piping?
The testing procedure itself follows the same code-based principles regardless of material, but nickel alloy and stainless systems require additional attention to chloride content in the test water, since residual chlorides left in contact with stainless or nickel alloy surfaces after testing can promote stress corrosion cracking over time. We specify low-chloride or demineralized water for testing stainless and nickel alloy piping and always follow with a thorough drain and dry cycle, a precaution that is not typically necessary on standard carbon steel systems.
Verifiable Sources
International Plumbing Code, International Code Council, current edition, hydrostatic and pneumatic testing requirements section.
Uniform Plumbing Code, International Association of Plumbing and Mechanical Officials, testing of plumbing systems section.
ASME B31.3, Process Piping, The American Society of Mechanical Engineers, pressure testing chapter.
ASME Boiler and Pressure Vessel Code, Section VIII, Division 1, The American Society of Mechanical Engineers, pressure testing requirements.
NFPA 13, Standard for the Installation of Sprinkler Systems, National Fire Protection Association, hydrostatic test procedure section.
API 570, Piping Inspection Code, American Petroleum Institute, in-service piping pressure testing guidance.
American Water Works Association, technical guidance on hydrostatic testing of water distribution piping.
Ready to Test Your Piping System the Right Way?
Whether you are a plumbing contractor confirming code compliance on a new build or a procurement engineer requiring a witnessed, documented hydrostatic test on a fabricated nickel alloy or stainless piping package, getting the pressure calculation, hold time, and documentation right the first time saves you from costly retests and schedule delays. Our team at MWalloys runs code-compliant hydrostatic test packages on every fabricated piping system we deliver, complete with calibrated gauge certificates and full test reports ready for your quality department. Reach out to our engineering desk today to discuss your project's testing requirements.