A2 tool steel is the best balanced choice when your tooling needs both good wear resistance and above-average toughness with excellent dimensional stability during heat treatment; if you need maximum abrasion resistance pick D2, and if you need maximum toughness pick S7 — but for most medium-run dies, punches and cutting tools A2 hits the sweet spot between cost, machinability and service life.
What is A2 tool steel
A2, often listed as AISI A2 or ASTM UNS T30102 and by international equivalents such as DIN 1.2363 and JIS SKD12, is an air-hardening, chromium-molybdenum, cold-work tool steel. It is designed to offer a middle ground between oil-hardening O1 and high-chromium D2 steel: better dimensional stability and toughness than O1, with higher wear resistance than O1 but lower carbide volume (thus higher toughness) than D2. Typical trade names and manufacturer designations include A2, BA2, and equivalents from tool steel producers.
Video Introduction: The Meaning of A2 Tool Steel.
If your project requires A2 tool steel, contact MWalloys for a free quote.
Chemical composition and microstructure
Chemical composition (typical ranges)
| Element | Typical range (wt%) | Role and effect |
|---|---|---|
| Carbon (C) | 0.95 – 1.05 | Provides hardness via martensite and carbide formation |
| Chromium (Cr) | 4.75 – 5.50 | Hardness, hardenability, corrosion resistance, carbide former |
| Molybdenum (Mo) | ~1.00 – 1.30 | Improves hardenability and high-temperature strength. |
| Vanadium (V) | ~0.20 – 0.40 | Forms fine carbides, improves wear resistance and toughness |
| Manganese (Mn) | ≤ 1.00 | Deoxidizer, improves hardenability in controlled amounts |
| Silicon (Si) | ≤ 0.50 | Deoxidizer, contributes to strength |
| Phosphorus, Sulfur (P, S) | ≤ 0.03 each | Kept low to preserve toughness and machining quality |
| Iron (Fe) | Balance | Matrix metal |
(Values compiled from standard datasheets and manufacturer specifications.)
Microstructure
In the quenched and tempered condition A2’s microstructure is predominantly tempered martensite with a relatively modest population of fine chromium and vanadium carbides. The moderate chromium content (≈5%) means carbides are smaller and fewer than high-Cr grades such as D2, which gives A2 improved toughness at the expense of some wear resistance.
Key mechanical properties and performance envelope
Representative mechanical properties (annealed vs heat treated)
| Property | Annealed | Typical hardened & tempered (target 58–60 HRC) |
|---|---|---|
| Hardness (HRC) | ~28–36 | 57–62 HRC (working range 57–60 typical) |
| Ultimate tensile strength | ~100 ksi (annealed) | up to ~300 ksi (depends on temper) |
| Yield strength | ~50 ksi (annealed) | varies with temper |
| Elongation | ~15–21% (annealed) | low in highly tempered/hardened states |
| Density | 7.86 g/cm³ (0.284 lb/in³) | — |
| Machinability (annealed) | ~60–85% of plain carbon (varies by source) | — |
Performance summary: A2 combines good wear resistance with impact resistance and excellent dimensional stability during heat treatment, making it suitable for dies, punches, shear blades, and medium-run cutting tools.

A2 tool steel equivalent
A2 tool steel equivalents include DIN 1.2363/X100CrMoV5, JIS SKD12, and BS BA2, among others, all representing the same air-hardening, cold-work alloy with good toughness and moderate wear resistance, making it suitable for complex dies and tooling. Other equivalents are China's Cr5Mo1V and France's Z40CDV5 (or Z100CDV5).
Here's a breakdown by standard:
- AISI/ASTM (USA): A2 / T30102.
- DIN/ISO (Germany): 1.2363 / X100CrMoV5 (or X100CrMoV5-1).
- JIS (Japan): SKD12.
- BS (UK): BA2 (BS 4659 Grade 1).
- AFNOR (France): Z40CDV5 / Z100CDV5.
- GB (China): Cr5Mo1V.
How A2 hardens — air-hardening and why it matters
A2 is an air-hardening alloy. That means after a proper austenitizing soak, it can be cooled in still air (or forced air for thick sections) and still develop the desired martensitic structure, which minimizes quench distortion and internal stresses compared to oil- or water-quenched grades. For components that must maintain tight tolerances after hardening — progressive dies, punches, and press tools — this dimensional stability is a major advantage.
Heat treatment: practical, shop-ready schedules
Note: Heat treatment must be matched to section thickness, furnace type and tooling function. The schedules below are industry-standard starting points; always validate with coupons and hardness checks.
Typical hardening and tempering recipe (step-by-step)
| Step | Typical parameters | Notes |
|---|---|---|
| Preheat | 650–800°F (343–427°C), two stages (e.g., 650°F then 1300°F) | Reduces thermal shock |
| Austenitize (hardening) | 1700–1800°F (927–982°C); soak 15–30 min/in depending on thickness | Uniform heating avoids decarburization |
| Cooling | Air quench (still or forced air) to ~150–200°F | Air-hardening property minimizes distortion |
| Tempering | Typical tempering cycles: 2 × 2 hours at 350–550°F (177–288°C) depending on target HRC | Double tempering recommended to stabilize and relieve stresses. Higher temper yields lower HRC and higher toughness. |
Common HRC targets and recommended tempering
-
62–64 HRC: temper at 300–350°F (for maximum wear resistance; toughness reduced)
-
58–60 HRC: temper at ~450–500°F for balanced wear and toughness.
Practical tips
-
Do not temper above ~800°F because sensitization and loss of toughness may occur.
-
For thick sections soak times must be increased (1 hr per inch as a rough rule). Use fixture design to reduce distortion.
-
Use controlled atmosphere or pack carburizing precautions to avoid decarburization on the surface during austenitizing.

Machining, grinding and EDM notes (manufacturing best practices)
-
Annealing for machining: Specify "annealed to approx 250 HB" or an equivalent hardness to maximize machinability; A2 in the annealed state machines more easily than D2 because of lower carbide volume.
-
Cutting speeds: Use conservative cutting speeds for hardened A2 (HRC >55); use CBN or ceramic inserts for high production grinding.
-
Pre-hardening operations: Drill, bore and finish machine to near-final dimensions before hardening where possible to minimize post-heat treatment grinding.
-
EDM considerations: A2 machines well by EDM but remember EDM will leave a recast layer; finish-grind or polish if fatigue life is critical.
-
Grinding: For tight tolerances, perform rough grinding prior to heat treatment and final grind after tempering, leaving appropriate stock for finishing.
Surface finishes, coatings and post-processing
-
Nitride or PVD: Applying a thin hard coating such as TiN or CrN can significantly extend die life for high-abrasion applications without dramatically altering base material toughness.
-
Carburizing/Nitriding: A2 is not commonly case hardened because its chemistry is optimized for through-hardening; if extreme surface hardness is required, select a different base grade or a surface treatment compatible with A2’s composition.
-
Shot peening: Improves fatigue life for cyclic loading components.
-
Polishing: For shear and blanking dies, a mirror polish reduces galling and improves part release.
Video Introduction: Introduction to the Generation Process of A2 Tool Steel.
A2 compared to D2, O1, S7 and other popular tool steels
Quick comparison table
| Grade | Hardenability | Wear resistance | Toughness / impact | Machinability (annealed) | Typical uses |
|---|---|---|---|---|---|
| A2 | Good (air-hardening) | Medium | Good | Good (60–85%) | Dies, punches, shear blades, medium-run cutters. |
| D2 | Very high (high Cr) | High | Lower (more brittle) | Poorer (higher carbide load) | Slitters, heavy wear cutters, long run knives. |
| O1 | Lower (oil-harden) | Lower | Moderate | Excellent (best for small runs) | Prototyping, low-run tooling |
| S7 | Lower wear resistance | Lower wear | Excellent toughness | Fair | Impact tools, punches for high shock |
| M2 (HSS) | High hot hardness | High (at temp) | Lower than A2 for impact | Poorer | High-speed cutting, taps, drills |
When to choose A2: choose A2 when you need a combination of wear life and shock resistance, dimensional stability after heat treatment, and easier shop processing compared to high-Cr powders.

Typical applications and real-world case examples
Applications where A2 excels
-
Blanking and piercing dies for medium-run stamping, where tight tolerances and low distortion after hardening are required.
-
Cold forging dies where impact and abrasion both occur.
-
Shear blades and slitter knives for light- to medium-duty applications.
-
Punches and dies for limited- to medium-volume production lines.
-
Cutting and forming tools where grindability and secondary machining are needed after final heat treatment.
Case note (generic): a medium-sized press shop replaced an oil-hardened grade with A2 for a set of sequential dies and recorded 20–40% less rework due to warpage after hardening, with a modest increase in tool life. This is typical of the dimensional stability advantage that air-hardening steels provide.
Procurement checklist for buyers and example PO/spec language
When you order A2 from a mill or distributor, include these minimum specifications in your purchase order or material callout:
Example specification snippet
Material: AISI A2 tool steel, UNS T30102, DIN 1.2363, JIS SKD12, normalized and annealed to approx. 250 HB (specify your target), material certificate EN10204 3.1 to be supplied. Chemical composition: C 0.95–1.05%, Cr 4.75–5.50%, Mo 1.00–1.30%, V 0.20–0.40%, Mn ≤1.00%, Si ≤0.50%, P,S ≤0.03% each. Supply condition: annealed/unhardened. Mill test report and O2/O1 traceability required. (Include tolerance, length/width, and surface finish).
Buyer tips
-
Ask for a material test report (MTR/COC) matching specification and for hardness readings in the supplied condition.
-
Specify intended hardness range post-treatment so the mill can advise on optimal stock removal if they supply pre-hardened material.
-
If you require EDM or tight-tolerance features, request special processing (e.g., ground flatness) before final heat treatment.
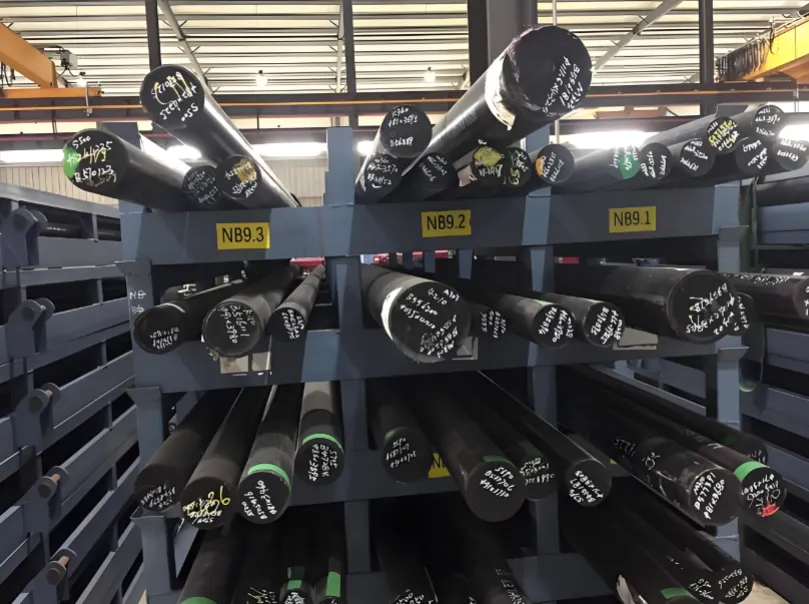
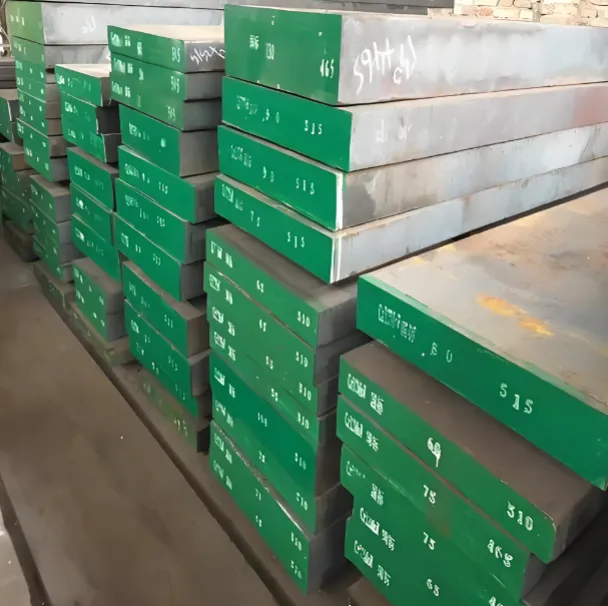
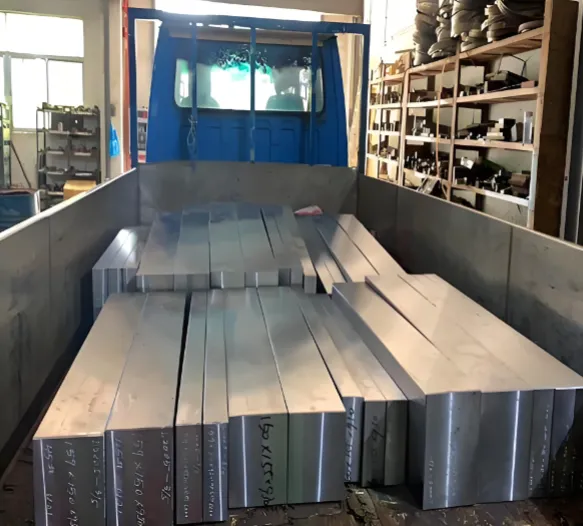
MWAlloys note: At MWAlloys we provide A2 in bar, plate and pre-machined blanks with full customization and factory pricing; for volume orders we can pre-anneal to a buyer-requested hardness and provide EN10204 3.1 certificates.
Common failure modes and inspection guidelines
Failure modes
-
Brittle fracture / chipping: often from over-hardening or incorrect tempering leading to low toughness.
-
Adhesive wear / galling: surface finish or lubrication problems, can be mitigated with coatings/polishing.
-
Fatigue cracking: cyclic stress concentration; shot peening and proper edge radii help.
-
Decarburization: from improper atmosphere control during austenitizing; causes soft surface layers.
Inspection checklist
-
Visual: check for scale or decarb, cracks, porosity.
-
Hardness mapping: Rockwell checks in multiple locations to confirm uniformity.
-
Microstructure (lab): metallography for carbide distribution and martensite.
-
Dimensional check after heat treatment: compare to net-shape target tolerance.
Environmental, recycling and sustainability notes
-
A2 is a ferrous tool steel and is fully recyclable through standard scrap and remelt streams. Using longer-life steels or thermal spray overlays can reduce total lifecycle resource use by extending tool life.
-
Work with suppliers that disclose mill energy profiles if carbon footprint is a procurement concern.
A2 Tool Steel FAQ
1. What hardness can I expect from A2 after proper hardening?
2. Is A2 air hardening? Do I need oil quench?
3. How does A2 compare to D2 for knife and shear applications?
4. What tempering schedule gives the best balance of properties for A2?
5. Can you polish A2 to a mirror finish?
6. What are typical machinability guidelines?
7. Is A2 suitable for vacuum or controlled atmosphere heat treatment?
8. Can A2 be welded?
9. What tolerances should I hold when designing for post-heat treatment finishing?
10. Where can I buy certified A2 steel in custom sizes and with factory pricing?
Practical buying checklist
-
Specify the exact standard (AISI A2 / UNS T30102 / DIN 1.2363).
-
Ask for MTR / EN10204 3.1.
-
Confirm delivered condition (annealed hardness).
-
State any required surface finish or pre-machining.
-
Specify tolerance and inspection method.
-
Demand heat-treat instructions if you plan to HT in-house.
Final notes for engineers and procurement teams
A2 is the pragmatic choice for medium-run tooling where a reasonable compromise between durability, toughness and shop-friendliness is required. It is not the absolute hardest or the absolute toughest material, but its air-hardening nature and dimensional stability make A2 a first-line recommendation for dies, punches and forming tools that will be produced and repaired in typical toolrooms. If you would like a tailored quotation for bar, plate or blanks, or need custom pre-annealing, MWAlloys can prepare material certificates and quote factory prices and custom dimensions.

